Your first time travel on a flight is always a memorable experience. Even if you have travelled by train or car before, it’s bound to be exciting when you get ready for your first flight in India– be it domestic or international.
My own first flight experience was in my childhood with my parents to visit Darjeeling when I flew to Bagdogra airport from Netaji Subhash Chandra Bose International Airport, Kolkata. Over the years, when I grew up, I travelled on flights across India many times and gained a massive experience. This expertise and further research on this matter made me confident on my next air trips.
If you aren’t sure how to travel on a flight, it can indeed be a little challenging to figure things out. Below are the airport procedures for the first time flyers and things to do upon reaching your destination. This should make things easier for you.
1. Making Your Itinerary
Your first step to travel in a domestic flight for the first time in India should be to create a complete itinerary for your trip, even before you buy the flight tickets. You can’t plan your flight dates and time properly unless your journey itinerary is ready. Even if you can’t work out all the details yet, fix your departure and return dates.
This is because it’s always wise to buy tickets for the return journey at the same time. Firstly, your plans might get messed up if you don’t get a return ticket on a preferred date later. Secondly, it’s cheaper to buy two-way tickets rather than buying tickets for onward and return journeys separately.
When planning your itinerary, also check for the availability of flight tickets on different dates. Sometimes it’s cheaper to get tickets two to three days before or after your initially planned date. The time taken during the flights matters too.
Travelling via connecting flights through other airports might be cheaper than direct flights. However, this would take longer than a direct flight, and you need to adjust your schedule accordingly. It pays to prepare your itinerary as early as possible. More time allows greater flexibility in adjusting your flight schedule to curtail costs.
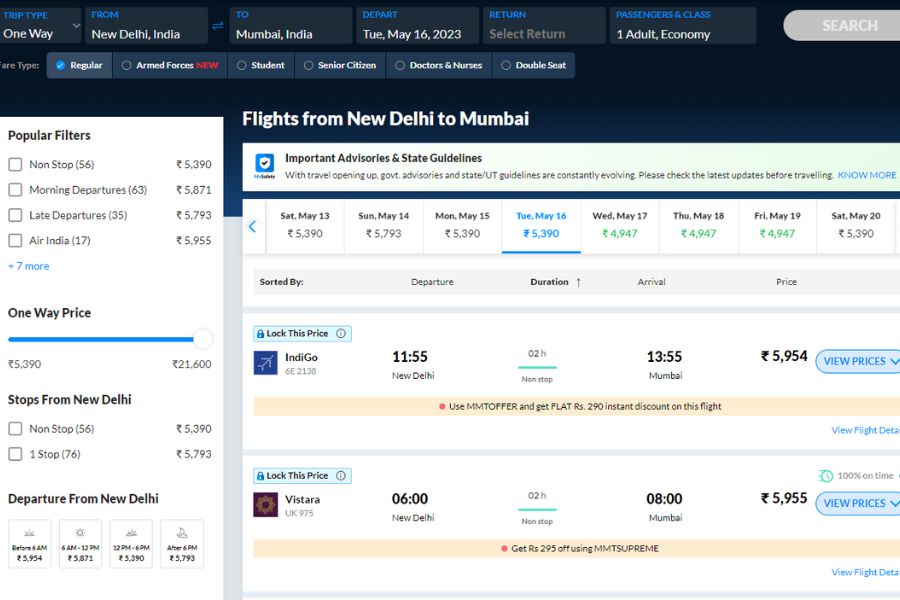
2. Booking Your Flight Tickets
Once you have planned your journey and decided on your travel dates, it’s time to get the flight tickets. You have several options in this regard – you may either buy it directly at the airline’s ticket counter or book it online. Buying your flight ticket through a travel agent is a viable choice too, especially if you’re already using a travel agency for other bookings.
Things To Remember When Buying Your Flight Tickets
While booking your flight tickets isn’t too difficult, there are several things to keep in mind. When buying plane tickets for the first time, it’s easy to make mistakes that could lead to unnecessary hassles later on.
- In case you use a credit card when buying flight tickets, you might be required to show it. So, carry it with you, just in case. If you happen to have bought the tickets using someone else’s credit card, you should carry a photocopy of it. You also need a letter from the person stating that his/her credit card was used with her consent. It’s not always required to show the credit card or the photocopy, but it’s best to stay prepared.
- Your first and last name on your flight ticket must match the name on your ID proof exactly. You may be barred from boarding the flight if there’s a discrepancy.
- Regarding discrepancies, you should note that spelling mistakes of up to three characters can be corrected by calling the airline’s customer care. They might make the correction and send you a revised version of your flight ticket.
- Passengers who don’t have a surname can simply write their first name twice instead, i.e., use it as their surname. Individuals who initially have no surname but get one after marriage can have a flight ticket with their new name on it, even if their ID proof still lacks a surname. However, if you already had a different surname before marriage, you need to carry an ID proof with your new surname.
- If you’re preparing to travel on a flight for the first time, note that the above flexibility doesn’t apply to international flights. Your name on the ticket and your ID proof must be an exact match without any exceptions. You may, however, skip your middle name (if you have one) when you book the ticket.
- In case you plan to travel with check-in luggage, don’t choose the hand luggage-only option. Don’t worry; you can always pay the necessary fee and take your check-in luggage on the flight if you decide to carry any later.
- You’ll need a proof of identity to support your claim for any concessionary fare you apply.
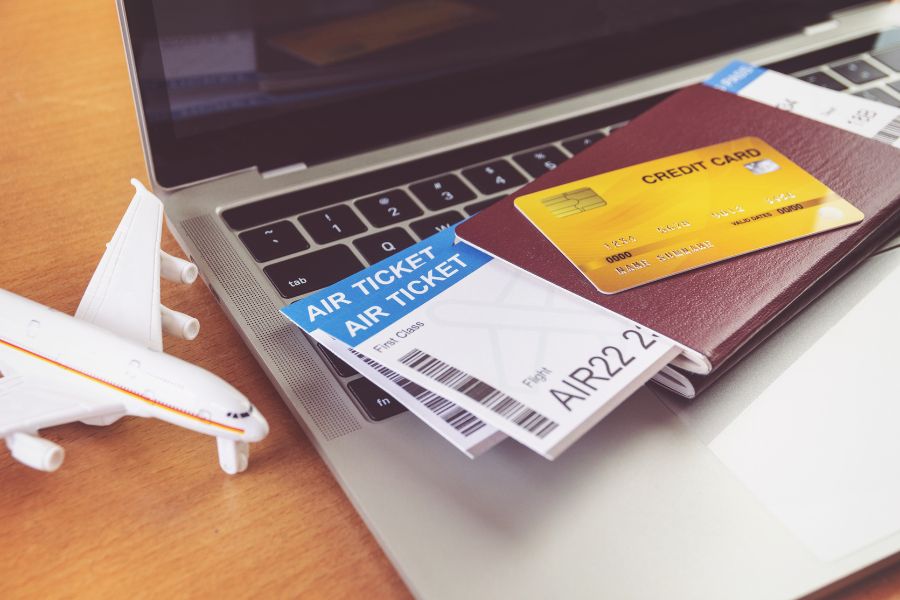
3. Arranging Necessary Documents
You must carry the necessary documents to be able to board the flight. As you might already know, airport security is particularly tight, and airlines are quite strict on this matter. Let’s check out the documents you’re going to need.
- Flight ticket (printed): Of course, you can’t possibly board a plane without a flight ticket. Make sure to carry a printed copy of it – not just a digital version. While there isn’t a rule about this, and a digital document on your smartphone is valid too, it’s good to have a plan B if your phone suffers a glitch. This is especially important during international flights, as immigration officers in other countries might ask you to show a printed ticket.
- A valid visa: It’s mandatory to carry a valid visa when travelling to a different country unless the destination country offers visa-free entry or has a visa-on-arrival facility.
- Passport: You might be excited to travel on an international flight for the first time, but don’t forget your passport. Everyone – even babies need passports or other valid travel documents from the country where they hold citizenship. Most countries wouldn’t approve a visa unless your passport is valid for at least six months. If you are planning to travel on a domestic flight, you don’t need a passport.
- Other identity proof: Your passport should already suffice as your proof of identity. However, domestic flights do not require passengers to carry passports, unlike international flights. Other documents like your Aadhar card, PAN card, voter ID card, ration card, or a school or college ID card are sufficient proof of identity too.
You may also use a public sector bank passbook with a photograph or an office ID card from a government office or a reputed private company. However, it varies for different airlines and you must confirm from their customer support.
For infants without a photo ID, their birth certificate can serve as their proof of identity instead. Apart from the mandatory documents, it’s also recommended to carry other documents like your hotel reservations, return flight tickets, and financial proofs.
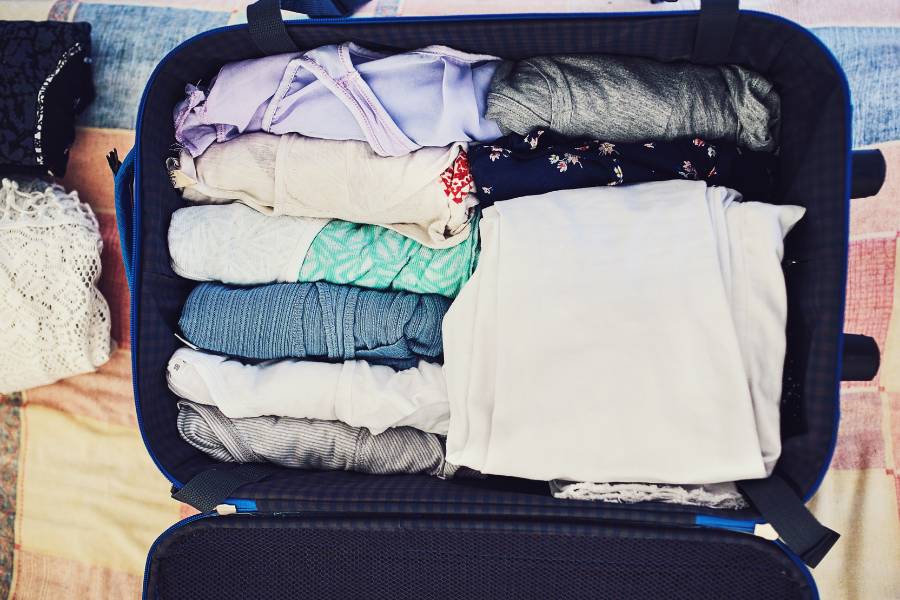
4. Packing Your Bags
As your departure date draws close, you may start packing your luggage. As always, it’s best to travel light and pack the bags as efficiently as possible. Here are some air travel guidelines to remember while you’re at it. If this is your first-time travel on the flight, please note that there are two types of luggage on planes.
- Carry-on luggage: Also known as hand baggage or cabin luggage, this is the luggage that you can carry with you in the plane’s cabin. There are restrictions on the weight and dimensions of carry-on luggage. Different airlines have different rules regarding carry-on baggage allowance, so it’s best to check with your airline. You can usually keep a trolley bag with a laptop bag or a medium backpack as carry-on luggage.
- Check-in luggage: Your remaining luggage, i.e., luggage that’s too heavy to carry in the aircraft cabin, would be transported in the plane’s cargo hold. This is known as check-in luggage. Airlines usually offer free check-in luggage allowance up to specific weight and dimensions, exceeding which would require you to pay a fee.
It is always recommended to check with your airline about their baggage limit. This way, you’ll be less likely to face an unpleasant surprise on the day of your flight. Luggage bags with trolley are the best options for travelling on flights.
Here are the baggage limits for most Indian airlines:
- Carry-on luggage: 7 Kg
- Checked-in luggage (domestic flights): 15 Kg
- Checked-in luggage (International flights): 30 kg
In case you love trekking and hiking, you would want to carry your backpack on the aeroplane. As long as you follow the above guidelines, you can easily carry your trekking bag on flights.
Know The Items You Cannot Carry On The Flight
There are a lot of restrictions on what you can carry on a flight and what you cannot. Most of these are for the sake of safety, to prevent accidents or equip passengers with something they can use as a weapon.
Items That Aren’t Allowed At All (Not Even In Checked Luggage)
- Explosive items: Crackers, fireworks, flares, and other combustible items
- Flammable items: Lighter fluid, gasoline, fuels, and paints.
- Chemicals: Spray paint, bleach, chlorine, acids, toxins, and fertilizers.
- Alcohol: Alcoholic beverages with more than 70% alcohol content.
Items Prohibited In Carry-on Luggage But Allowed In Checked Luggage
- Sharp objects: Scissors, knives, tent spikes, box knives (with secure wrapping)
- Sporting goods: Martial arts equipment, hockey sticks, crickets and baseball bats, golf clubs, etc.
- Self-defence items: Pepper and mace spray (with safety measures to prevent accidental discharge). Firearms, nerf guns, and BB guns (in secure hard-case packaging).
- Alcohol: Bottled alcoholic beverages with up to 70% alcohol content, as long as their retail packaging is unopened.
Keeping these rules in mind when packing your luggage will save you a great deal of trouble when passing through airport security. Also, remember that these restrictions may vary slightly from country to country. Check the list of travel essentials you might like to carry on your trip.
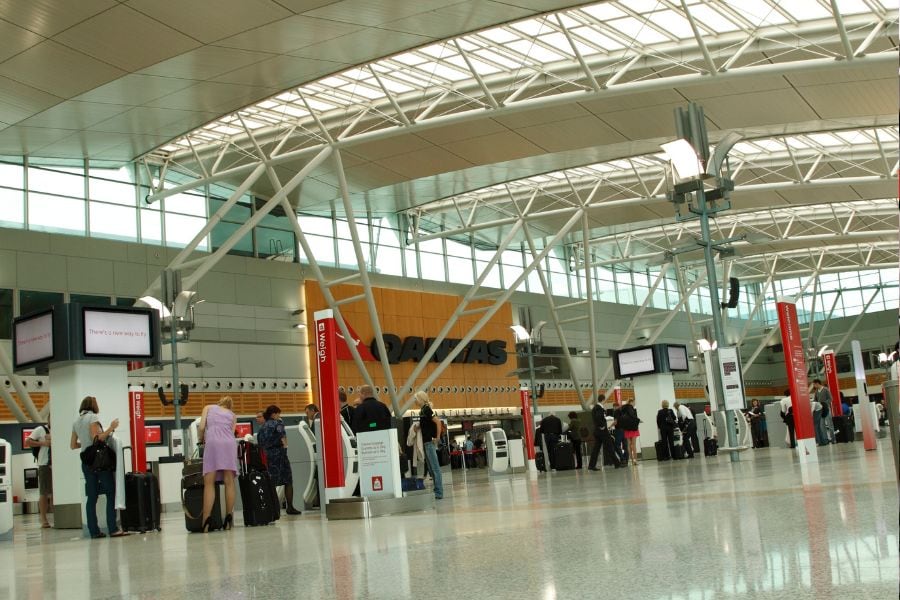
5. Travelling To Your Departure Airport
I know you might find it a bit weird to find this listed, but reaching your airport terminal might be more complicated than you think. This is because the same airport can have different terminals located far away from each other. Accidentally arriving at the wrong one can cause a lot of delays. Check your designated terminal on the ticket before you leave for the airport.
I faced this exact problem when returning from Pawna Lake via Chhatrapati Shivaji Maharaj International Airport, Mumbai. It has two Terminals (1 and 2), 5.6 Km apart. While Terminal-1 is for domestic flights, Terminal-2 is for international flights.
Without having this knowledge, I accidentally travelled to Terminal-2, where I got to know that my flight was scheduled from Terminal-1! This caused a lot of hassle and tension, but I finally arrived at the right location within the specified time, as I left early.
Ultimately, this critical experience taught me a lesson, and now I always research on the airport before commencing my trips. I would suggest the same to you for a smooth travel experience.
Here is a list of recommended timeline within which you should reach the airport.
- Domestic flights (small airports): 1 hour and 30 minutes to two hours
- Domestic flights (large airports): 2 hours and 30 minutes
- International flights (small airports): 2 hours
- International flights (large airports): 3 hours
In most Indian airports, the boarding gates close 20 minutes before the time of departure. The counter closure time is usually 45 and 60 minutes before the departure time for domestic and international flights.
6. Document Verification & Baggage Screening
Now that you’re at the airport, it’s time to get your documents verified, and your baggage checked. To gain entry to the airport, you must show the security personnel the original valid identity proof copy. Both printed documents and digital files saved on smartphones are fine for this.
You also need a valid flight ticket to gain access to the airport terminal. If you have an airport entry ticket, you may enter the visitors’ area without a flight ticket.
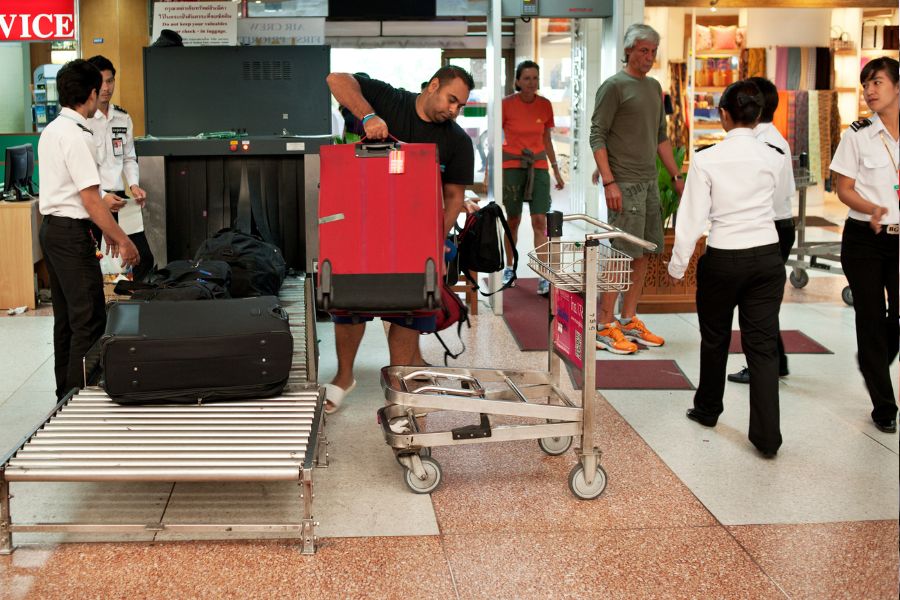
You’ll find baggage screening X-ray machines soon after entering the terminal. You need to get your check-in luggage screened here, and check-in counters do not accept unscreened luggage. Your luggage will be marked with a sticker once screened, and you are not to open it anymore. If you do open it, you will have to get the baggage screened again and have a new sticker applied.
7. Getting Your Boarding Pass And Checking In Your Luggage
In order to board your flight, you first need a boarding pass. You can obtain this from a boarding pass counter at the airport. Usually, there are many boarding pass counters at an airport – at least one for each airline. The staff at the counter will verify your identity and issue a boarding pass, which would contain information like your name, boarding time, flight gate number, seat number, etc.
This is when your luggage gets checked in too. The airport personnel will check in your screened luggage and put a sticker on the back of your boarding pass. Check the sticker to verify that the number of bags mentioned there is correct, both at the check-in and the destination. If any additional check-in luggage fees apply to your baggage, you’ll have to pay up now.
Web Check-in (for Both Domestic & International Trips)
You may also check-in online from your smartphone, which is the best possible option and I personally do it every time. You’ll receive a boarding pass online after this web check-in. You may print a copy of this boarding pass and use it to enter the terminal, as well as pass through the other areas and ultimately board your flight.
Web check-in is a particularly good option if you’re travelling with only carry-on luggage, as it’ll help you avoid the queue at the check-in counter altogether. If you’re checking in at the counter, the staff there will collect your check-in luggage. Passengers who check in online can hand over their luggage at the luggage drop counter instead.
8. Going Through The Security Check
You might be wondering what to do after getting the boarding pass. Now comes the part that can sometimes take a while – security checking.
You’ll be presented with a tray to put all your electronic gadgets in. The security personnel might also ask you to place clothing and other belongings like jackets, belt, ankle-length boots, wallets, etc., in another tray.
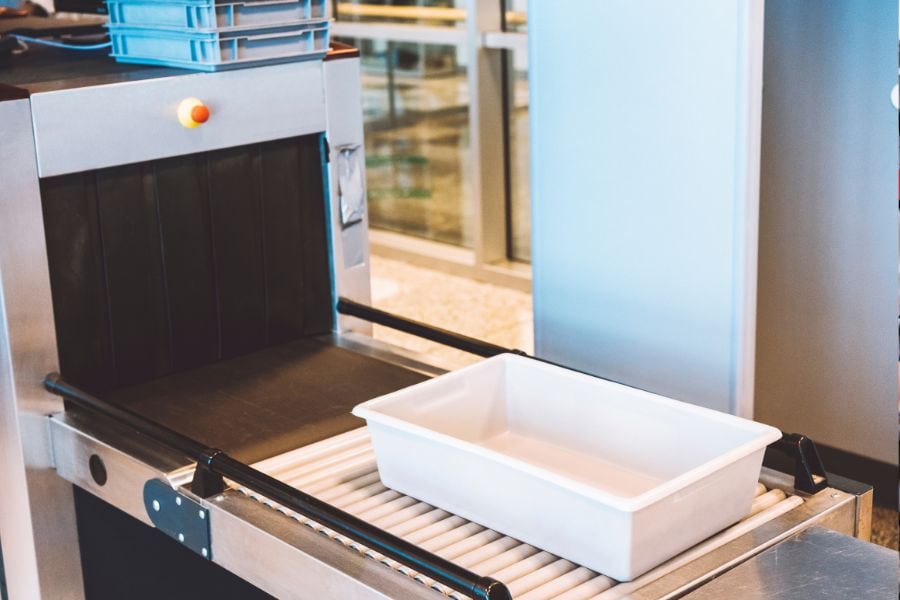
After completing security check, you are free to collect all your belongings and proceed to the next step.
9. Obtaining Immigration Clearance
Unlike domestic travel, immigration officers would check your passport and visa for the country you are travelling to for international locations. They will grant you immigration clearance by stamping a departure seal on your passport.
In many places, you might have to fill up a departure card before you proceed for immigration clearance. The immigration officers may also ask you your purpose of visit and take scans of your fingerprints. However, you need not go through this procedure at the airport for a domestic flight.
10. Boarding The Aircraft
Now that you have successfully passed all the checks and documentation procedures, you may now proceed to the boarding gate. Assuming you’ll be there quite a bit earlier than the departure time, you can spend some time exploring the various facilities at the airport.
You’ll usually find a waiting lounge with amenities like Wi-Fi, charging ports, etc. This is a good time to charge your phone, laptop, or other electronic devices if they’re running low on battery. You’ll also find plenty of food stalls and restaurants for food and drinks. At terminals of some of the major airports like Delhi Airport, it’s also possible to order food online through dedicated apps.
Once it’s time to board your flight, an announcement will be made. Look for LCDs installed all over the place – they’ll have the flight number on them. Check them to confirm your gate number, even if the information is already there on your boarding pass.
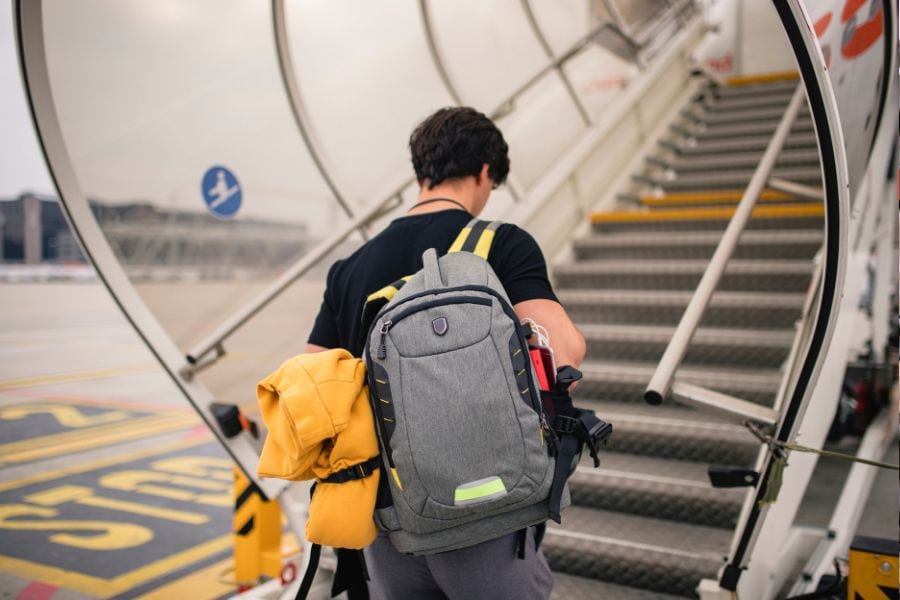
Depending on the distance, an airport shuttle bus might pick up all the passengers and carry them to the plane. However, you may also have to simply walk over a connecting aerobridge to enter the aircraft instead.
11. Getting Settled On The Flight
You can now settle in and relax, knowing that you have successfully boarded the plane. Find your seat by checking the seat number given on your boarding pass and get seated. The air hostesses or the pilot will have some instructions for all passengers, mostly about various safety measures. These include:
- Fastening your seat belts
- Putting your baggage in the overhead compartments or under your seat and securing them
- Turning off phones and all other electronic devices
- Making sure that the seats and the tables are all in an upright position, etc.
Once your flight takes off, all you have to do is enjoy your first aeroplane travel. If you’re lucky enough to get a window seat, you should already be able to enjoy great views.
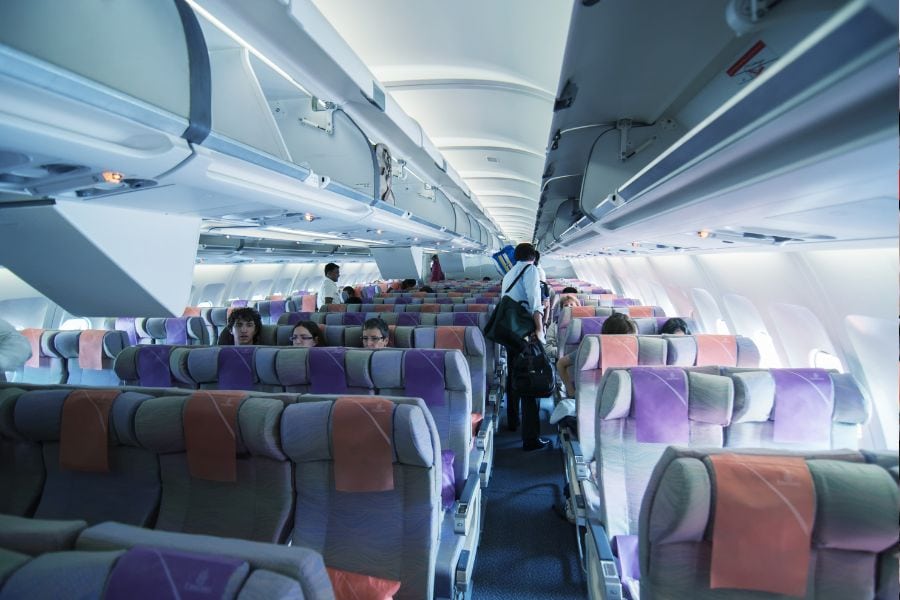
Thankfully, most flights come with private in-flight entertainment (IFE) TVs for each passenger. There are always many movies and TV shows to choose from, as well as additional content like games and music. You may also turn your phone back on after the plane has successfully taken off and are free to use it during the flight.
12. Arriving At The Destination Airport
After touching down at the destination airport, the aircraft will park, and the cabin crew will let you know when it’s time to disembark. Before getting off the plane, collect your carry-on luggage from the overhead compartment.
The remaining process is pretty much the opposite of boarding a plane. Upon walking down the aerobridge, you may walk to the terminal. If it’s some distance away, a bus will pick you up and take you there instead.
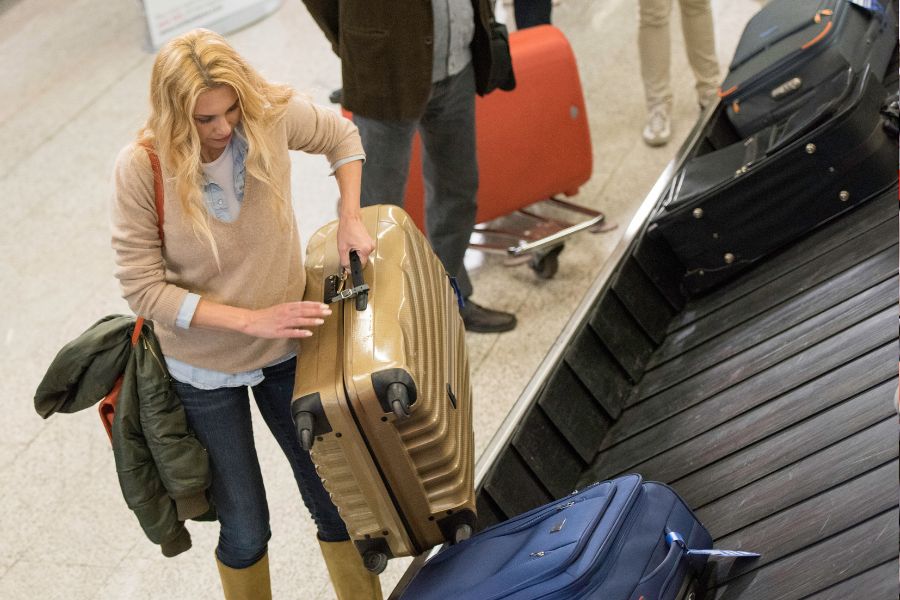
13. Collecting Your Luggage
The luggage bags usually rotate on a conveyor belt, from which you may collect them. The LCDs in the arrival hall usually mention the conveyor belt number where the passengers from a specific flight will find their luggage. In many cases, the cabin crew announces this information too.
If you are travelling to another country, your luggage needs to pass customs clearance. You may have to pay a duty fee on declared goods like jewellery and other valuables.
Usually, there are two channels for customs clearance – a red one for declared goods and a green one for other items. Make sure to check which items count as declared goods and pay up the necessary fee. Passing through the green channel without paying your customs duty, even accidentally, is a punishable offence.
14. Leaving The Airport
You may exit the airport once you have passed all the clearances. Most major airports have taxi stands outside where you can grab a cab. Besides this, airports also come with pre-paid taxi and bus services.
I hope you will get enough time to plan and prepare for your journey in advance. However, even if you must make your first flight in a hurry, this guide will help. Don’t worry; travelling on domestic flights in India has become quite easy and convenient once you get used to it.
The first few times, you might find it a bit hectic because of the various procedures to go through, especially for international flights. Here are some first-time flight journey tips for you:
- Keep essential items like important documents, medicines, glasses, etc., in your hand baggage. Although it’s not too common, checked baggage can sometimes get misplaced or go missing.
- Label all your luggage with a tag to prevent mix-ups, and put your contact information on it.
- It’s best to wear shoes that are easy to take off, as the airport security personnel might require you to remove them during the screening.
- Luggage allowance, customs clearance, and other rules may vary from one country or airline to another. Research them in detail in advance to avoid inconveniences.
- In case you are an international traveller and visiting India for the first time, check the Guidelines for International Arrivals by the Govt. of India (Ministry of Health and Family Welfare).
So, now you know how to board a flight and what procedures you’ll have to go through. I wish you a happy journey and hope your first flight experience will be great.
USER REVIEWS
Good & Perfect Article. Found some interesting tips for my upcoming first-time travel. Cheers..!!! 😍❤️